About This Blog
I like food. A lot. In this blog, I will divulge all my delicious recipes, giving you a full list of ingredients, step-by-step instructions, and notes to help you successfully make the dish. Feel free to try these at home, and let me know how it went in the comments for the dish! If you have any questions, I will answer them as quickly as possible. If you use my recipe and discuss it on your site, please link back to this blog. Happy eating!
Sunday, December 8, 2013
The "Use Your Leftover Beef" Tortilla
We recently made my fantastic Velveeta Mac and Beef casserole (which you can see in a previous post), and I had a bunch of leftover ground beef. I needed to find something to do with it.
So we decided to make a breakfast burrito with scrambled eggs, mozzarella cheese, and (for me) jalepeños. It was fantastic and delicious and very heartwarming after a long day at work.
So really, this post is not so much a recipe, as a discussion about leftovers.
I think breakfast burritos work really well for leftover beef -- eggs and beef go so well together!
But I think that the best way to think about leftovers is not just to eat them as they were originally cooked, but to try and turn them into something else! Hence the burrito.
How do you use your leftovers? Leave a comment below and let me know!
Thursday, August 1, 2013
The Dessert Tower
I made this dessert something like a year ago, before I started this blog, and the photo went into the archive, never to be seen again...
Until I saw it, like a flash! on Richard's screensaver. And that's when I realized this treasure must be dug up and revealed to the world.
So here it is; the dessert tower. Built with layer on layer of deliciousness, it's fun, messy, and awesome for any time of year.
Ingredients:
1 package puff pastry sheets
1 package Jell-O instant vanilla pudding
1 container Cool Whip, thawed
1 container blueberries
Directions:
Cook puff pastry according to box instructions.
Make pudding according to box instructions.
Allow puff pastry to cool to handling temperature and cut sheets into squares.
Stack Dessert Tower as desired, using pudding, Cool Whip, and berries.
Enjoy.
Notes:
As with every dessert, this one has a lot of room for some wiggle. Different flavours of pudding can be used, different berries. Chocolate chunks can be placed in the Cool Whip. Experiment with your Tower, and let me know how it goes!
Be sure to serve/eat the Towers just after assembling, or the pastry can get soggy.
This is a great party dessert! Simply cook and cut the pastry and set on a table with all kinds of fixin's. Let your guests assemble their own Towers for maximum delicious happiness!
I hope you enjoyed this recipe! Thanks for reading!
If you have any comments or questions, feel free to leave them below. Don't forget to let me know how your Tower turned out!
Monday, July 22, 2013
Blondies With Dark Chocolate and Chopped Almonds
I've sort of been in the mood to bake recently. I've been dwelling on the idea of chocolate. Chocolate cookies. Chocolate cake. Chocolate everything.
But I couldn't decide what to make, so I put it off. Finally, today, shopping day, I made my decision; I wanted to make something I haven't done before. Something amazing and delicious and new.
Enter the Blondie.
I've never made blondies. In fact, I've rarely had them. Still, they have a certain charm to them that I cannot resist. So, when we went shopping, I picked up some extra butter. It turns out it was the only ingredient I really needed, although now I am out of brown sugar...
These are so fun and delicious, and mine are extra thick -- I used a 8x8 pan instead of a 13x9, since I don't own the latter (*hint hint Christmas gift! hint hint*). As a result, the cooking time was a little longer than I expected, but it worked out perfectly. The consistency is great, the flavours are wonderful, and they fulfilled my need to bake.
So, without further ado...!
Ingredients:
1 1/2 cups packed brown sugar
1 cup unsalted butter, melted completely
2 1/4 cups flour
3/4 tsp baking soda
1/2 tsp salt
2 eggs
1 tsp vanilla
dark chocolate drops (optional)
chopped raw almonds (optional)
Directions:
Preheat oven to 375 degrees Fahrenheit (190 Celsius).
Grease and flour baking pan.
Add brown sugar to mixing bowl. Melt butter completely, and add to sugar, stirring until the mixture is smooth. Allow to cool to room temperature.
As sugar mixture is cooling, whisk flour, baking soda, and salt together in a separate bowl.
Beat eggs and vanilla into sugar mixture, making sure to incorporate completely.
Add flour mixture little by little. Mix until batter becomes thick.
Add chips and nuts, as desired.
Pour batter into baking dish, making sure to spread evenly.
Bake between 20-25 minutes (13x9) or 35-40 minutes (8x8), or until a toothpick inserted into the centre comes out clean.
Allow blondie cake to cool in pan for about 5-10 minutes, then transfer to cooling rack. Cool completely, cut and serve.
Notes:
Play around with the additions to your blondies. For example, you can do a butterscotch-walnut combo, or use multiple chocolates.
I used a secret ingredient in mine to make them extra delicious, but I can't tell you what it is!! Play around with flavours in your blondies -- add spices or extracts that you think will work well.
Thank you for reading! I hope I've inspired you to be a little adventurous in the kitchen!
If you have any questions or comments about this recipe, please leave them below.
Do forget to follow this blog to learn about all the yummy things happening in my kitchen!
Thursday, July 11, 2013
Independence Day Done Different: Chicken Spring Rolls and Spicy Mushroom Soup
So, the fourth of July was last week (this post would have come sooner had I not spent Friday to Tuesday in New York with family). For foreigners who don't know, this is the day that we have deemed Independence Day, where we celebrate the birth of America as we know it (sort of) by grilling, swimming, and drinking beer.
Richard and I have been doing a lot of the grilling thing this summer, eating many a hot dog and cheeseburger (or more accurately, BISON cheeseburgers) as the result of my friend Nichole coming over for dinner a lot. Usually she wants food and offers to buy stuff, so I try to stick to the easy stuff.
As a result of the frequent grilling, I decided to break the rules of Independence Day and make spring rolls. I teased my Facebook friends with this photograph, taken from my phone after shopping for the meal:
Now, I had never made spring rolls before, so I was a little concerned about using the rice papers in which the innards would be wrapped. As it turns out, the worry was a little premature, as they were fairly easy to manipulate.
Since I had never made spring rolls before, I debated for a long while as to whether I would make crispy (deep fried) rolls, or fresh ones. These each require different techniques to be employed, and I had to make sure I was able to make the best dish possible with my available equipment. So I went with fresh.
Another thing I was concerned with was dipping sauces, which I'll discuss a little later. The short version is I wanted a sauce for the spicy food lovers (i.e. mostly just me) and something sweet for basically everyone else.
That said, let's get down to the nitty gritty:
Fresh Spring Rolls:
Ingredients:
Boneless chicken tenders
Green leaf lettuce (Note: I picked up a head from the organic section of my grocery. Keep in mind that it's not iceberg lettuce we're using here -- Green leaf has considerably less water, and generally doesn't come in the neatly packed head of lettuce you find packaged)
Carrots, cut into thin strips
Green onions, chopped
Fresh Cilantro
1 package spring roll wrappers
Directions:
Cook chicken tenders thoroughly in butter or oil, using salt and pepper to season, to taste. Be careful not to char the outside, but do brown it a little.
When cooked, let chicken rest and cool for five minutes. When cool enough to handle, cut into strips.
Soak spring roll wrapper in water until it becomes pliable. Place on a paper towel to remove excess water.
Place green leaf lettuce on wrapper, add chicken, carrots, onion, and a spring of cilantro on top.
Roll.
Garnish with sliced fresh cucumber.
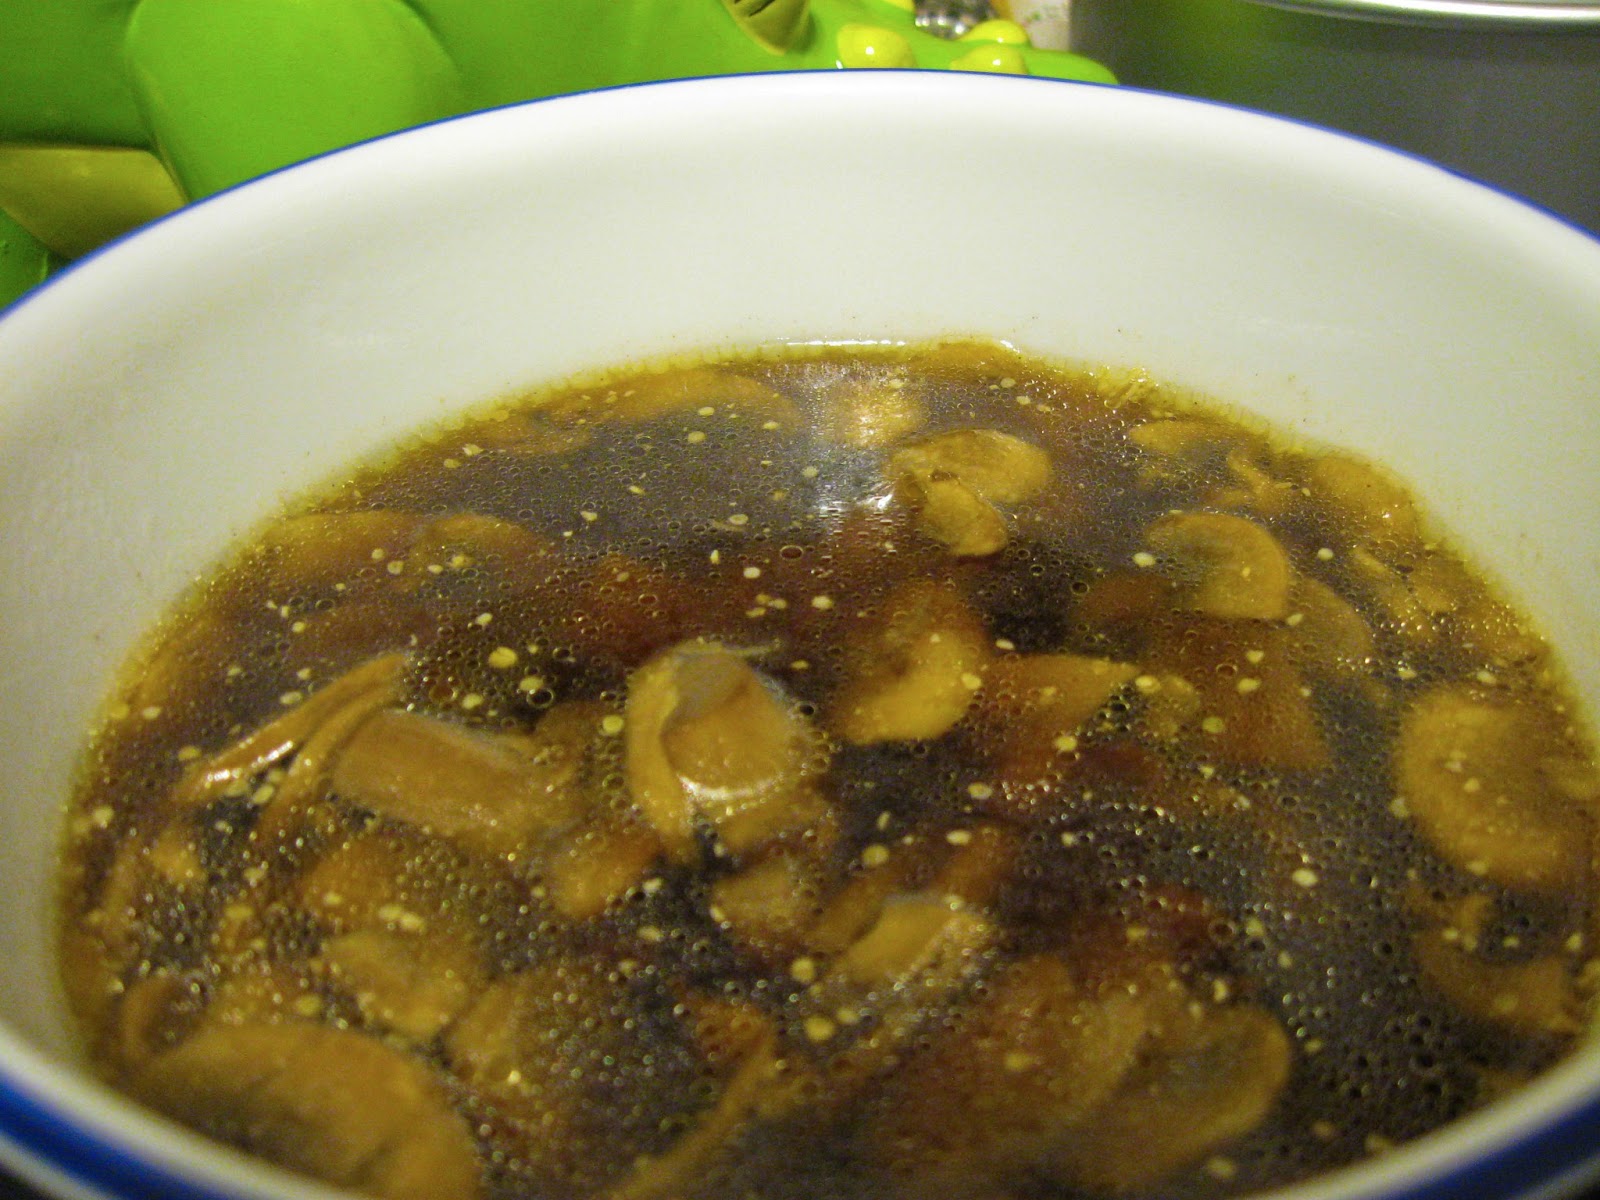
Mushroom soup
Ingredients:
1 to 1.5 pounds mushrooms, cleaned and sliced thin
1.5 inches fresh ginger, peeled and finely grated
32 oz (4 cups) low sodium vegetable stock
3 large garlic cloves, peeled and crushed
Salt
Ground white pepper
Ground mustard seeds
Butter or oil
Rice noodles
Directions:
Warm butter or oil, garlic, and ginger in large pot.
Add mushrooms to pot and cook until tender, stirring often.
Add stock and seasoning, to taste.
Bring soup to a boil and cook for 10 minutes.
Pour soup over rice noodles and serve immediately.
Dipping Sauces:
As I mentioned before, I wanted to make dipping sauces for this recipe, so I decided to stay fairly simple. For the sweet sauce, I just watered down a bit of Sweet Baby Ray's Hickory and Brown Sugar BBQ sauce to a better dipping consistency.
The spicy sauce contained House of Tsang Szechuan Spicy Stir Fry sauce, soy sauce, and white pepper, brought to dipping consistency with just a touch of water. It was really delicious. Just the right amount of hot to go with the milder flavours in the spring rolls.
The whole ensemble looked like this:
This meal was super delicious, and perfectly light for the hot summer weather of July 4th. This meal is also one of the healthier ones I've made, with lots of veggies to soothe the palate. Overall, this meal was simple to make, delicious to eat, and a wonderful success for a first shot at spring rolls!
Richard and I have been doing a lot of the grilling thing this summer, eating many a hot dog and cheeseburger (or more accurately, BISON cheeseburgers) as the result of my friend Nichole coming over for dinner a lot. Usually she wants food and offers to buy stuff, so I try to stick to the easy stuff.
As a result of the frequent grilling, I decided to break the rules of Independence Day and make spring rolls. I teased my Facebook friends with this photograph, taken from my phone after shopping for the meal:
Now, I had never made spring rolls before, so I was a little concerned about using the rice papers in which the innards would be wrapped. As it turns out, the worry was a little premature, as they were fairly easy to manipulate.
Since I had never made spring rolls before, I debated for a long while as to whether I would make crispy (deep fried) rolls, or fresh ones. These each require different techniques to be employed, and I had to make sure I was able to make the best dish possible with my available equipment. So I went with fresh.
Another thing I was concerned with was dipping sauces, which I'll discuss a little later. The short version is I wanted a sauce for the spicy food lovers (i.e. mostly just me) and something sweet for basically everyone else.
That said, let's get down to the nitty gritty:
Fresh Spring Rolls:
Ingredients:
Boneless chicken tenders
Green leaf lettuce (Note: I picked up a head from the organic section of my grocery. Keep in mind that it's not iceberg lettuce we're using here -- Green leaf has considerably less water, and generally doesn't come in the neatly packed head of lettuce you find packaged)
Carrots, cut into thin strips
Green onions, chopped
Fresh Cilantro
1 package spring roll wrappers
Directions:
Cook chicken tenders thoroughly in butter or oil, using salt and pepper to season, to taste. Be careful not to char the outside, but do brown it a little.
When cooked, let chicken rest and cool for five minutes. When cool enough to handle, cut into strips.
Soak spring roll wrapper in water until it becomes pliable. Place on a paper towel to remove excess water.
Place green leaf lettuce on wrapper, add chicken, carrots, onion, and a spring of cilantro on top.
Roll.
Garnish with sliced fresh cucumber.
Mushroom soup
Ingredients:
1 to 1.5 pounds mushrooms, cleaned and sliced thin
1.5 inches fresh ginger, peeled and finely grated
32 oz (4 cups) low sodium vegetable stock
3 large garlic cloves, peeled and crushed
Salt
Ground white pepper
Ground mustard seeds
Butter or oil
Rice noodles
Directions:
Warm butter or oil, garlic, and ginger in large pot.
Add mushrooms to pot and cook until tender, stirring often.
Add stock and seasoning, to taste.
Bring soup to a boil and cook for 10 minutes.
Pour soup over rice noodles and serve immediately.
![]() |
| These thin rice noodles work really well -- they cook right when you pour the hot soup on. |
Dipping Sauces:
As I mentioned before, I wanted to make dipping sauces for this recipe, so I decided to stay fairly simple. For the sweet sauce, I just watered down a bit of Sweet Baby Ray's Hickory and Brown Sugar BBQ sauce to a better dipping consistency.
The spicy sauce contained House of Tsang Szechuan Spicy Stir Fry sauce, soy sauce, and white pepper, brought to dipping consistency with just a touch of water. It was really delicious. Just the right amount of hot to go with the milder flavours in the spring rolls.
The whole ensemble looked like this:
![]() |
| Ignore all the clutter on my table! |
This meal was super delicious, and perfectly light for the hot summer weather of July 4th. This meal is also one of the healthier ones I've made, with lots of veggies to soothe the palate. Overall, this meal was simple to make, delicious to eat, and a wonderful success for a first shot at spring rolls!
Notes:
Spring rolls are so diverse, so if you choose to make some, play around with your flavours! Chicken is a great protein, but you can try just about anything, from pork to shrimp to tofu for a vegetarian option!
My best advice for the spring rolls is to be sure you use some sort of herb in them. I used cilantro, but mint would have been a great choice, too. Consider your protein carefully when paring up flavours for your rolls.
When I made the soup, I actually added ground ginger to it, because I had a hard time tasting it. Whilst strongly tasting the ginger certainly doesn't have to be a goal for you when making this soup, if you want to, I suggest adding some more of the fresh stuff, or just have ground ginger on hand.
White pepper was great for this soup. It has a sharper, more distinct flavour in my experience, especially when you don't have it often. Experiment with the amount -- you might be surprised at how much of the spice suits your fancy!
With dipping sauces, the sky is the limit. Mine are pretty simple, but you can up the ante for yours if you wish. Try making more complex sauces, or heating yours up to give it more character.
As a final note, For anyone who looked at the initial photo and wondered how limes and heavy cream would figure into this recipe, they don't. I made lime possets for dessert, but didn't actually take a photo this time. You can find my recipe for lime possets here.
Thanks for reading! I hope these recipes have inspired you to try something new in the kitchen, or to think about food for holidays a little more differently! As always, if you have any questions or comments, feel free to leave them below.
Don't forget to follow this blog to learn about all the delicious things happening in my kitchen!
P.S. Over the holiday weekend, I have obtained a pasta crank! I'm so excited to use it, I can barely think straight. Finally, my dream of making butternut squash ravioli can come true!
Sunday, June 2, 2013
Grilled Flank Steak With Red Wine Mushroom Sauce
Memorial Day was last Monday, and I wanted to try something new to celebrate.
Momma Brayton gave us a big flank steak at some point (who knows how long ago that was), and I finally took it out of the freezer, thawed it, and seasoned it. But the real reason I made the steak was so I could try my hand at making a red wine mushroom sauce. And it was fantastic.
Ingredients:
Flank Steak Marinade
Salt
Ground black pepper
Garlic powder
Worcestershire sauce
Dried rosemary
Red Wine Mushroom Sauce
1 package mushrooms
1/2 cup dry red wine
1/4 cup low sodium beef broth
1/4 cup heavy cream
1 tbsp butter
Olive oil
Parsley
Salt
Ground black pepper
3 large garlic gloves, minced
Dred thyme
Potatoes
Olive oil
2 medium-sized knobs of butter
Salt
Ground black pepper
Dried rosemary
3 large garlic cloves, crushed
Directions:
One or two days prior to cooking, marinate meat, wrap in plastic wrap, and put in fridge.
Heat grill to medium heat.
Season potatoes in large bowl, excluding butter.
Pour potatoes onto aluminum foil, add butter, and cover with more foil to create a package. Place on grill and cook for 15-20 minutes, or until potatoes are tender.
Add flank steak about five minutes after potatoes, and cook to desired doneness.
To Make Sauce:
Add butter, oil, and minced garlic to medium or large pot.
Bring to medium heat and sauté garlic until soft and fragrant.
Add mushrooms, salt, and pepper, and cook until mushrooms are tender, stirring often.
Add thyme and red wine. Cook down until about 50% reduced.
Add beef broth. Cook down until about 75% reduced.
Remove from heat, slowly add heavy cream with stirring. Add more salt and pepper if needed, add parsley.
![]() |
| Don't those potatoes look scrumptious? |
![]() |
| Red wine mushroom sauce |
![]() |
We like our steak between rare and medium rare. Look how juicy!![]() |
Notes:
Pay a lot of attention to the sauce. Mushrooms stick to the pot very easily if you don't stir often. One trick you might want to try is just to sauté the mushrooms on a lower heat, and turning it up when you add the wine.
Since I planned this meal last minute, we didn't have the chance to go to the liquor store for straight up wine, and we bought a cooking wine from the grocery store. This worked just as well, but cooking wines often contain salt, so adjust your recipe accordingly.
If you can't obtain a low-sodium beef broth, you can use regular beef broth but again, adjust the salt you add to the sauce.
Before you add heavy cream, you must remove from heat! The cream can curdle in the presence of high heat.
If you are unsure about the temperature of your meat, cut into it and take a look! Our flank steak had multiple thicknesses, so we had to check the temperature of ours twice.
Thanks for reading! Hopefully you're inspired to make a delicious meal trying new techniques!
If you have any comments or questions, leave them below.
Don't forget to follow this blog to keep up-to-date on all the yummies coming out of my kitchen!
Grilled Chicken Avocado Sandwiches
Richard and I are really into avocado lately, especially after that taco night.
We made this little number for lunch, using marinated chicken tenders. Creamy, delicious, flavourful yumminess ensued.
Ingredients:
Cut and trimmed chicken tenders (not breaded)
Swiss cheese
Lettuce
Avocado
Whole wheat buns
Marinade:
Honey mustard
Salt
Ground black pepper
Chili powder
Garlic Powder
Directions:
Marinate thawed chicken tenders overnight.
Bring grill to medium heat.
Grill marinated tenders until fully cooked, turning once to keep juices in the meat (3-5 minutes per side, depending on thickness of tenders).
Assemble sandwich!
Notes:
This is a very easy-peasy recipe, but it's become one of my favourites. The flavours work so well together, and didn't require any condiments (If you want some, obviously feel free).
Make sure to use an avocado at the correct ripeness. There are some really helpful tools on the Internet that can help you pick the right one from your grocery store.
Mix it up with this sandwich! Add tomato, spinach, or whatever tickles your fancy. For the daring, I recommend a few slices of granny smith apple.
Thank you for reading! I hope this quickie recipe has inspired you to make your own delicious summer sandwich.
As always, if you have any questions or comments, please leave them below. Don't forget to follow this blog to keep up-to-date on all the yummies!
Monday, May 6, 2013
Happy Cinco de Mayo! Beef and Chicken Taco Bowls
I don't normally buy into holiday hype, falling into making "traditional" foods to celebrate. I don't even celebrate Easter. But lately, thinking about Cinco de Mayo has gotten me pondering my own heritage; far from Mexican, but I can't help but consider some of the Guatemalan foods my father is more accustomed to.
Although things like tacos tend resonate more firmly "Mexican" than anything, my father used to tell us about when he would eat similar foods, made with homemade corn tortillas. I don't have the knowledge to make my own tortillas, but I wanted to give some exploration to my culinary heritage, and what better excuse than Cinco de Mayo?
So I developed a meal plan after reading some recipes, twisting them up, and building my own flavours. I know I haven't shown you any photos yet, but bear with me. The wait is worth it. :)
I wanted to have a variety of tacos/flavours to this dinner. The obvious choices were ground beef and chicken. I thought briefly about adding hot sausage to the mix, but I decided against it. I figured we had enough food with the other two (I was right).
Before I get into the nitty gritty of this dinner, I want to make one note: This would definitely be a fantastic meal for having guests. One could easily run away with the amounts, making enough for one extra guest, or ten, or even more.
So, let's get down to it:
Ingredients:
Beef taco mix:
1-1.5 pounds ground beef
2 large garlic cloves, peeled and chopped
Salt
Ground black pepper
Chili powder
Worcestershire sauce
Chicken taco mix:
Boneless chicken breast, trimmed and cut into small pieces
2 medium garlic cloves, peeled and chopped
Honey mustard
Salt
Ground black pepper
Chili powder
Garlic powder
Fixings:
4-inch flour tortillas (listed as "Fajita Size" on the package)
Chopped lettuce
Diced plum tomato
Diced avocado
Chopped jalapeño
Shredded mild cheddar cheese
Drinks:
Old Orchard cranberry pomegranate frozen juice concentrate
Sprite
Fresh blueberries
Directions:
When chicken breast is thawed, trim and cut into small pieces. Put pieces into a bowl, add enough honey mustard to saturate all pieces. Add salt, pepper, chili powder, and garlic powder as desired, mix thoroughly. Pour chicken onto piece of plastic wrap, wrap up, and put in fridge for two hours (or longer if you want).
When you're ready to cook, start by chopping up all your fixings:
Put fixings in the fridge until ready to use.
Preheat oven to 375 F (190 C).
Warm tortillas in microwave (about 30 seconds per stack of five; flip stack halfway through).
Fold tortillas into cups of muffin pan, being careful not to break them.
Bake tortillas for 10-15 minutes until tops have browned, and cups have hardened into shape. Here's what they'll look like:
Meanwhile, cook chicken and beef in separate pans:
Drain beef of grease, pour into serving bowl.
With all the cooking and prep done, the ensemble looks like this:
Ready to finally see what these bad boys look like, all made up?
These bowls were absolutely delicious! They're fun to make, fun to eat, and a fantastic meal for get togethers. The only minor issue is that they are really messy. I mean, really messy. Keep a plate underneath and a fork on hand!
Although things like tacos tend resonate more firmly "Mexican" than anything, my father used to tell us about when he would eat similar foods, made with homemade corn tortillas. I don't have the knowledge to make my own tortillas, but I wanted to give some exploration to my culinary heritage, and what better excuse than Cinco de Mayo?
So I developed a meal plan after reading some recipes, twisting them up, and building my own flavours. I know I haven't shown you any photos yet, but bear with me. The wait is worth it. :)
I wanted to have a variety of tacos/flavours to this dinner. The obvious choices were ground beef and chicken. I thought briefly about adding hot sausage to the mix, but I decided against it. I figured we had enough food with the other two (I was right).
Before I get into the nitty gritty of this dinner, I want to make one note: This would definitely be a fantastic meal for having guests. One could easily run away with the amounts, making enough for one extra guest, or ten, or even more.
So, let's get down to it:
Ingredients:
Beef taco mix:
1-1.5 pounds ground beef
2 large garlic cloves, peeled and chopped
Salt
Ground black pepper
Chili powder
Worcestershire sauce
Chicken taco mix:
Boneless chicken breast, trimmed and cut into small pieces
2 medium garlic cloves, peeled and chopped
Honey mustard
Salt
Ground black pepper
Chili powder
Garlic powder
Fixings:
4-inch flour tortillas (listed as "Fajita Size" on the package)
Chopped lettuce
Diced plum tomato
Diced avocado
Chopped jalapeño
Shredded mild cheddar cheese
Drinks:
Old Orchard cranberry pomegranate frozen juice concentrate
Sprite
Fresh blueberries
Directions:
When chicken breast is thawed, trim and cut into small pieces. Put pieces into a bowl, add enough honey mustard to saturate all pieces. Add salt, pepper, chili powder, and garlic powder as desired, mix thoroughly. Pour chicken onto piece of plastic wrap, wrap up, and put in fridge for two hours (or longer if you want).
When you're ready to cook, start by chopping up all your fixings:
![]() |
| Jalapeños. Or, as I like to call them, Jallies. |
![]() |
| Regular old lettuce |
![]() |
| Sexy Avocado. Yum; I wish I liked avocado more. |
![]() |
| Regular old tomatoes. |
Put fixings in the fridge until ready to use.
Preheat oven to 375 F (190 C).
Warm tortillas in microwave (about 30 seconds per stack of five; flip stack halfway through).
Fold tortillas into cups of muffin pan, being careful not to break them.
Bake tortillas for 10-15 minutes until tops have browned, and cups have hardened into shape. Here's what they'll look like:
![]() |
| Don't they look good already? |
Add garlic and butter or oil to each pan, bring to medium heat.
Add beef to pan, add seasonings as desired.
Add chicken to pan.
Stir meats often, being careful to cook thoroughly.
Transfer chicken to serving bowl.
![]() |
| Scrumptious, yes? |
Berry Spritzers
These drinks were the perfect sweet addition to this flavourful meal; and they were simple to make! Just add some of the juice concentrate to a tall glass, fill with Sprite, and plop some blueberries in. The best part is that the blueberries soak up the mix, so when you eat them at the end, they taste like the fruit and the mix together. Delicious!
![]() |
| Don't they look yummy? |
![]() |
| Look at those blueberries, bubbling away. |
With all the cooking and prep done, the ensemble looks like this:
![]() |
| The whole shebang on my really messy card table. |
![]() |
| Front bowl: beef, cheese, lettuce, and avocado |
![]() |
| Chicken bowl: with lettuce, cheese, and jalapeño |
These bowls were absolutely delicious! They're fun to make, fun to eat, and a fantastic meal for get togethers. The only minor issue is that they are really messy. I mean, really messy. Keep a plate underneath and a fork on hand!
Notes:
My pictured taco bowls were only two out of many combinations. Have fun mixing things up; including the meat in a bowl!
Other meats could certainly be used. I'm still wondering what it would have been like to have sausage in there...
We used plain old lettuce and tomatoes, but you can season them up if you want; instead of just tomatoes, make a fresh pico de gallo, or add lime and seasonings to the lettuce just before use.
You'll probably have leftovers -- we have a ton of leftover beef from this recipe -- so find fun ways to use them up. One of my favourite ways is to heat up some beef and put it on a sandwich with fried egg and cheese. Delicious.
If you're doing this meal for a party, ask what people would want for their fixings, or ask them to make some to bring. Getting guests involved in the meal makes everyone enjoy it more.
Of course, you can add salsa to these taco bowls. We decided not to, partially because they were already so flavourful, and partially because they were already so messy!
Thank you for reading! I hope I've inspired you to try this in your own home! If you have any comments or questions about this meal, please leave them below. And don't forget to follow this blog for updates on all the Yummy things happening in my kitchen!
Subscribe to:
Posts (Atom)