About This Blog

I like food. A lot. In this blog, I will divulge all my delicious recipes, giving you a full list of ingredients, step-by-step instructions, and notes to help you successfully make the dish. Feel free to try these at home, and let me know how it went in the comments for the dish! If you have any questions, I will answer them as quickly as possible. If you use my recipe and discuss it on your site, please link back to this blog. Happy eating!

Tuesday, April 15, 2014

Fake doesn't have to mean boring! Imitation crab with seasoned carrots and seasoned rice.


Another beautiful photo. Love it.
Tell me; when you think of imitation crab, what do you think? Stir fry? Rangoon? A cold salad laden with mayo?
Poo on that, I say! Poo!
I decided we would approach out fake crab with a little more flair! And it's a good thing -- it was so delicious, I can't wait to do it again.

Ingredients:
1 package imitation crab
2 or 3 large carrots, peeled and sliced thin
long grain rice
1 lime
sesame seeds
sumac
slivered almonds
cumin
coriander
honey
salt
black pepper

Directions:
Heat olive oil in a skillet to medium heat. Add imitation crab, salt and pepper. Cook to allow some browning on the crab. Finish crab with some butter and sesame seeds.
In a small pot, add a cup of water, the carrots, and the juice of half the lime. Heat over medium heat until carrots are tender. When cooked, drain water. Add juice of remaining half of lime, almonds, cumin, coriander, honey, salt and pepper to taste.
Cook rice according to package instructions. When fully cooked, stir in sumac.

Notes:
Honestly, I didn't even measure out the spices. I just sort of added it and tasted and adjusted and found the best mix that way.
The sumac has a very nice citrusy flavour, but try not to add too much -- it can be fairly overpowering.
Finishing the crab with butter helps to give the crab an extra punch, so don't overlook this step!

Grilled Salmon Burger with Marinated and Grilled Summer Squash


I know I don't normally post the photos this big, but look at that beauty. So beautiful. So delicious. So... summer.
Yes. I made this last summer, and it just never made its way here.
It was really just an experiment. We ended up with salmon burgers because they were on sale. I generally never end up with fish, especially in the summer, because I'm too busy grilling up hunks of land animal (mostly beef) to care about water dwelling creatures. Nonetheless, we ended up with these salmon burgers, and it was my task to figure out what to do with them.
Since it was summer, my thought went to summer squash: both of the zucchini and yellow variety. In the end, I decided to use them kind of like pickles on the sandwich.
The problem with summer squash is that they can really dry up on the grill if you're not careful, so I marinated them with this fantastic balsamic glaze from Market District. I gave them a ten minute soak in the glaze to let them pull the deliciousness in and then set them on the part of the grill not *quite* over the bars. They turned out amazing.

Ingredients:
Salmon burgers
Sandwich buns of choice
Bibb lettuce (or whatever not-Iceberg you prefer)
1 yellow squash, cut in thin rounds
1 zucchini squash, cut in thin rounds
Market District balsamic glaze (or equivalent)

Directions:
Grease grill to prevent sticking. Heat to medium heat.
Cook salmon burgers, ensuring they are fully cooked before removing from grill.
As burgers cook, soak squash in glaze, making sure they are fully coated.
Five minutes before burgers are done, place squash on place on grill not directly over heat. Cook for five minutes, or until they are tender.
Assemble sandwich and drizzle top with more glaze.

Notes:
Admittedly, these could have benefitted from some nice, creamy slices of avocado, but I didn't think of it at the time.
These would be really good served with a light salad, a grilled veggie kebab, or some homemade french fries or chips. Explore the possibilities of flavour!

Stuffed Portobello Mushrooms


I recently became starkly aware that I haven't updated to this in quite some time, which is a darn shame, because some pretty neat things have been happening in my kitchen lately.
So this is the stuffed Portobello. It's a recent concoction, and totally delicious.
I keep reading and hearing all these benefits to going vegetarian, but the reality is that I can't, because bacon and beef are both things. So, I will be a meatasaurus until the end of my days.
That said, this dish can easily convince me to make a higher percentage of my meals vegetarian.

Ingredients:
4 to 8 large Portobello mushrooms, depending on their size
1 cup diced yellow tomato
1 cup diced red tomato
1 cup shredded mozzarella
1 cup Panko breadcrumbs
1/2 cup chopped chives
salt and fresh ground black pepper, to taste

Directions:
Preheat broiler.
Remove mushroom stems.
Clean gills out of inside of mushroom.
Cover a baking sheet with aluminum foil and coat lightly with olive oil.
Broil mushrooms, gill side down, for five minutes.
Combine tomatoes, cheese, Panko, and chives in a large bowl and mix well.
Stuff mushrooms with filling, and broil for five minutes, or until cheese is melted.
Serve with light salad, or as a side dish.

Notes:
The gills are kind of a pain to get out of the mushrooms and spooning them out can result in tearing into the flesh, so try to be as gentle as possible.
The mushrooms shrink a LOT in the oven, so account for that when you purchase them. We only bought four and ended up with a lot of stuffing left over. Thankfully, it worked super well in pizza several days later!
If you've never had them before, you should know that yellow tomatoes are really quite sweet. I didn't know this ahead of time, as I'm not much of a tomato person, so I was taken back by the flavour. I think it throws the dish off a bit, so I would probably give them a soak in something savory next time to counteract it, but the sweetness is not a deal breaker, by any means.


Sunday, December 8, 2013

The "Use Your Leftover Beef" Tortilla


We recently made my fantastic Velveeta Mac and Beef casserole (which you can see in a previous post), and I had a bunch of leftover ground beef. I needed to find something to do with it.
So we decided to make a breakfast burrito with scrambled eggs, mozzarella cheese, and (for me) jalepeƱos. It was fantastic and delicious and very heartwarming after a long day at work.
So really, this post is not so much a recipe, as a discussion about leftovers.
I think breakfast burritos work really well for leftover beef -- eggs and beef go so well together!
But I think that the best way to think about leftovers is not just to eat them as they were originally cooked, but to try and turn them into something else! Hence the burrito.
How do you use your leftovers? Leave a comment below and let me know!

Thursday, August 1, 2013

The Dessert Tower


I made this dessert something like a year ago, before I started this blog, and the photo went into the archive, never to be seen again...
Until I saw it, like a flash! on Richard's screensaver. And that's when I realized this treasure must be dug up and revealed to the world.
So here it is; the dessert tower. Built with layer on layer of deliciousness, it's fun, messy, and awesome for any time of year.

Ingredients:
1 package puff pastry sheets
1 package Jell-O instant vanilla pudding
1 container Cool Whip, thawed
1 container blueberries

Directions:
Cook puff pastry according to box instructions.
Make pudding according to box instructions.
Allow puff pastry to cool to handling temperature and cut sheets into squares.
Stack Dessert Tower as desired, using pudding, Cool Whip, and berries.
Enjoy.

Notes:
As with every dessert, this one has a lot of room for some wiggle. Different flavours of pudding can be used, different berries. Chocolate chunks can be placed in the Cool Whip. Experiment with your Tower, and let me know how it goes!
Be sure to serve/eat the Towers just after assembling, or the pastry can get soggy.
This is a great party dessert! Simply cook and cut the pastry and set on a table with all kinds of fixin's. Let your guests assemble their own Towers for maximum delicious happiness!

I hope you enjoyed this recipe! Thanks for reading!
If you have any comments or questions, feel free to leave them below. Don't forget to let me know how your Tower turned out!

Monday, July 22, 2013

Blondies With Dark Chocolate and Chopped Almonds


I've sort of been in the mood to bake recently. I've been dwelling on the idea of chocolate. Chocolate cookies. Chocolate cake. Chocolate everything.
But I couldn't decide what to make, so I put it off. Finally, today, shopping day, I made my decision; I wanted to make something I haven't done before. Something amazing and delicious and new.
Enter the Blondie.
I've never made blondies. In fact, I've rarely had them. Still, they have a certain charm to them that I cannot resist. So, when we went shopping, I picked up some extra butter. It turns out it was the only ingredient I really needed, although now I am out of brown sugar...
These are so fun and delicious, and mine are extra thick -- I used a 8x8 pan instead of a 13x9, since I don't own the latter (*hint hint Christmas gift! hint hint*). As a result, the cooking time was a little longer than I expected, but it worked out perfectly. The consistency is great, the flavours are wonderful, and they fulfilled my need to bake.
So, without further ado...!

Ingredients:
1 1/2 cups packed brown sugar
1 cup unsalted butter, melted completely
2 1/4 cups flour
3/4 tsp baking soda
1/2 tsp salt
2 eggs
1 tsp vanilla
dark chocolate drops (optional)
chopped raw almonds (optional)

Directions:
Preheat oven to 375 degrees Fahrenheit (190 Celsius).
Grease and flour baking pan.
Add brown sugar to mixing bowl. Melt butter completely, and add to sugar, stirring until the mixture is smooth. Allow to cool to room temperature.
As sugar mixture is cooling, whisk flour, baking soda, and salt together in a separate bowl.
Beat eggs and vanilla into sugar mixture, making sure to incorporate completely.
Add flour mixture little by little. Mix until batter becomes thick.
Add chips and nuts, as desired.
Pour batter into baking dish, making sure to spread evenly.
Bake between 20-25 minutes (13x9) or 35-40 minutes (8x8), or until a toothpick inserted into the centre comes out clean.
Allow blondie cake to cool in pan for about 5-10 minutes, then transfer to cooling rack. Cool completely, cut and serve.

Notes:
Play around with the additions to your blondies. For example, you can do a butterscotch-walnut combo, or use multiple chocolates.
I used a secret ingredient in mine to make them extra delicious, but I can't tell you what it is!! Play around with flavours in your blondies -- add spices or extracts that you think will work well.

Thank you for reading! I hope I've inspired you to be a little adventurous in the kitchen!
If you have any questions or comments about this recipe, please leave them below.
Do forget to follow this blog to learn about all the yummy things happening in my kitchen!

Thursday, July 11, 2013

Independence Day Done Different: Chicken Spring Rolls and Spicy Mushroom Soup

So, the fourth of July was last week (this post would have come sooner had I not spent Friday to Tuesday in New York with family). For foreigners who don't know, this is the day that we have deemed Independence Day, where we celebrate the birth of America as we know it (sort of) by grilling, swimming, and drinking beer.
Richard and I have been doing a lot of the grilling thing this summer, eating many a hot dog and cheeseburger (or more accurately, BISON cheeseburgers) as the result of my friend Nichole coming over for dinner a lot. Usually she wants food and offers to buy stuff, so I try to stick to the easy stuff.
As a result of the frequent grilling, I decided to break the rules of Independence Day and make spring rolls. I teased my Facebook friends with this photograph, taken from my phone after shopping for the meal:

Now, I had never made spring rolls before, so I was a little concerned about using the rice papers in which the innards would be wrapped. As it turns out, the worry was a little premature, as they were fairly easy to manipulate.
Since I had never made spring rolls before, I debated for a long while as to whether I would make crispy (deep fried) rolls, or fresh ones. These each require different techniques to be employed, and I had to make sure I was able to make the best dish possible with my available equipment. So I went with fresh.
Another thing I was concerned with was dipping sauces, which I'll discuss a little later. The short version is I wanted a sauce for the spicy food lovers (i.e. mostly just me) and something sweet for basically everyone else.
That said, let's get down to the nitty gritty:

Fresh Spring Rolls:
Ingredients:
Boneless chicken tenders
Green leaf lettuce (Note: I picked up a head from the organic section of my grocery. Keep in mind that it's not iceberg lettuce we're using here -- Green leaf has considerably less water, and generally doesn't come in the neatly packed head of lettuce you find packaged)
Carrots, cut into thin strips
Green onions, chopped
Fresh Cilantro
1 package spring roll wrappers

Directions:
Cook chicken tenders thoroughly in butter or oil, using salt and pepper to season, to taste. Be careful not to char the outside, but do brown it a little.
When cooked, let chicken rest and cool for five minutes. When cool enough to handle, cut into strips.
Soak spring roll wrapper in water until it becomes pliable. Place on a paper towel to remove excess water.
Place green leaf lettuce on wrapper, add chicken, carrots, onion, and a spring of cilantro on top.
Roll.
Garnish with sliced fresh cucumber.
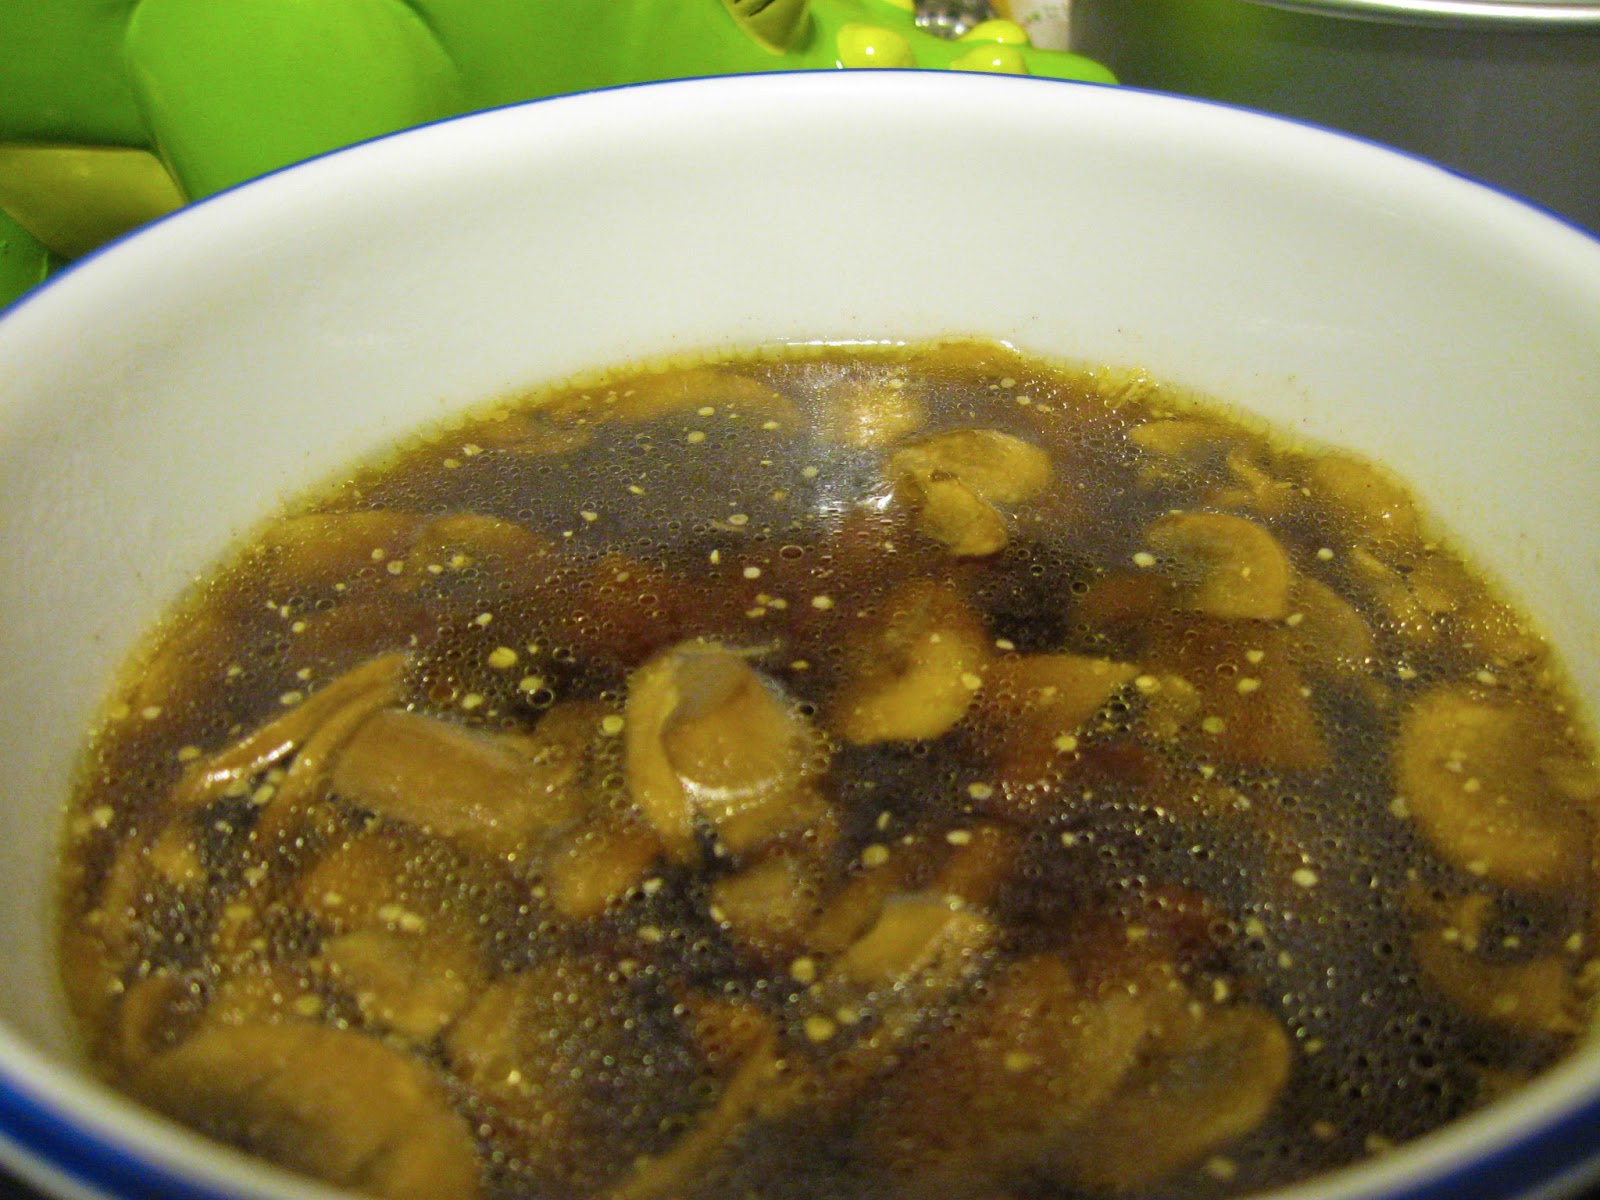

Mushroom soup
Ingredients:
1 to 1.5 pounds mushrooms, cleaned and sliced thin
1.5 inches fresh ginger, peeled and finely grated
32 oz (4 cups) low sodium vegetable stock
3 large garlic cloves, peeled and crushed
Salt
Ground white pepper
Ground mustard seeds
Butter or oil
Rice noodles

Directions:
Warm butter or oil, garlic, and ginger in large pot.
Add mushrooms to pot and cook until tender, stirring often.
Add stock and seasoning, to taste.
Bring soup to a boil and cook for 10 minutes.
Pour soup over rice noodles and serve immediately.

These thin rice noodles work really well -- they cook right when you pour the hot soup on.


Dipping Sauces:
As I mentioned before, I wanted to make dipping sauces for this recipe, so I decided to stay fairly simple. For the sweet sauce, I just watered down a bit of Sweet Baby Ray's Hickory and Brown Sugar BBQ sauce to a better dipping consistency.
The spicy sauce contained House of Tsang Szechuan Spicy Stir Fry sauce, soy sauce, and white pepper, brought to dipping consistency with just a touch of water. It was really delicious. Just the right amount of hot to go with the milder flavours in the spring rolls.

The whole ensemble looked like this:

Ignore all the clutter on my table!

This meal was super delicious, and perfectly light for the hot summer weather of July 4th. This meal is also one of the healthier ones I've made, with lots of veggies to soothe the palate. Overall, this meal was simple to make, delicious to eat, and a wonderful success for a first shot at spring rolls!

Notes:
Spring rolls are so diverse, so if you choose to make some, play around with your flavours! Chicken is a great protein, but you can try just about anything, from pork to shrimp to tofu for a vegetarian option! 
My best advice for the spring rolls is to be sure you use some sort of herb in them. I used cilantro, but mint would have been a great choice, too. Consider your protein carefully when paring up flavours for your rolls. 
When I made the soup, I actually added ground ginger to it, because I had a hard time tasting it. Whilst strongly tasting the ginger certainly doesn't have to be a goal for you when making this soup, if you want to, I suggest adding some more of the fresh stuff, or just have ground ginger on hand.
White pepper was great for this soup. It has a sharper, more distinct flavour in my experience, especially when you don't have it often. Experiment with the amount -- you might be surprised at how much of the spice suits your fancy!
With dipping sauces, the sky is the limit. Mine are pretty simple, but you can up the ante for yours if you wish. Try making more complex sauces, or heating yours up to give it more character.

As a final note, For anyone who looked at the initial photo and wondered how limes and heavy cream would figure into this recipe, they don't. I made lime possets for dessert, but didn't actually take a photo this time. You can find my recipe for lime possets here

Thanks for reading! I hope these recipes have inspired you to try something new in the kitchen, or to think about food for holidays a little more differently! As always, if you have any questions or comments, feel free to leave them below.
Don't forget to follow this blog to learn about all the delicious things happening in my kitchen!

P.S. Over the holiday weekend, I have obtained a pasta crank! I'm so excited to use it, I can barely think straight. Finally, my dream of making butternut squash ravioli can come true!